

You’re sitting around, anxiety setting in from the 25 browser tabs open on, “how to install solar power in a van”. Stressed out about paying someone $1,000 to do it for you. Well, this guide is for you!
We’ve been traveling in our van for over a year so far and are thankful for the benefits of our solar set up. Prior to the installation, neither Dom nor I had any electrical knowledge or experience. It took us several months of research to feel comfortable enough to do the set up ourselves. I’ve compiled and simplified information we found helpful, and added some of the tips we learned along the way by doing our own build. Hopefully this guide will be a helpful resource to any prospective van dwellers that want to solar in their van, but have no idea where to get started. I attempt to be as straightforward as possible, so you can get set up and be on your way to many adVANtures!

DISCLAIMER: We are NOT professionals and have simply detailed the steps we took in our solar installation. Electrical work can be dangerous and you should consult an electrician if you have concerns on doing the installation yourself.
Breakdown:
- How Much Energy Will I Use?
- How Do I Protect My System?
- What Do I Need?
- How Do I Put It Together?
- Flow Chart
- Extra thoughts
1. How Much Energy Will I Use?
- List all your electrical items (ie: lights, fridge)
- List how long you plan to use each per day (ie: fan = 15 hours)
- Find the wattage in documentation (ie: Fridge = X watts)
- Divide by 12 to get Amps (Watts / Voltage) (ie: Lights… 5 W / 12 V = 0.417 A)
- Multiply Amps by your hours to get Amp Hours (ie: 0.417 A * 6 Hrs = 2.5 Ah)
(Watts / Voltage = A * Hrs/ day = Ah)
Voltage = 12, even if using an inverter which processes 120V AC, because it pulls 12V DC before converting the energy.
| Item | Watts | Voltage | Hours per day |
Ah (W/V*Hr) |
Comment |
| Induction Hob | 1200 | 12 | .75 | 75 | Based on a ‘medium’ setting of 5 |
| Lights | 5 | 12 | 6 | 2.5 | |
| Fan | 12 | 12 | 15 | 15 | |
| Fridge | 27 | 12 | 24 | 54 | Set at 39.5 F (4 C). |
| Laptop | 30 | 12 | 1 | 2.5 | |
| Water pump | ~1 |
For a detailed post on our choice of induction for cooking, check out the article Van Build: Induction Cooktop. Once in a while we will charge camera batteries, phones, and kindles, but these can be done from the car battery while we drive. We also stop at coffee shops regularly and it is easy to charge electronics from there, so those are not factored into the calculations.
In total, we estimated we would use 150 Ah per day. We decided on a 200 Watt system (two 100 Watt panels), but would have room to add a third panel or alternator in the future, if needed. This is coupled with two 125Ah batteries for a 250Ah system. Only 50% capacity should be used before recharging to maintain battery performance. While 150 is over the 125 Ah “availability”, the batteries are recharging during the day between the time we cook breakfast and dinner, as well as anytime we are using the lights and fan while the sun is still out.
Some would argue we should have gone with a bigger system but in the months we’ve been traveling, we haven’t felt an immediate need to upgrade. As sun-chasers, we prefer traveling in the van during sunny months. There have only been a couple occasions where we had multiple cloudy days and ran low enough on solar that we decided to eat out rather than cook.
2. How Do I Protect My System?
Fuses and circuit breakers protect wiring and the devices connected in the system. In the event of a short circuit, a section of the fuse is designed to break and disrupt the circuit.
Difference between in-line fuses and wiring to a fuse block?
- In-line fuses – Fuse and its holder is fitted into a cable and intended to protect the main components of a solar build (inverter, batteries, charge controller, solar panels)
- Wiring to a fuse block – Fuses are housed inside a piece of equipment (fuse block) and intended to protect appliances (fridge, lights, fan)
This short article by Renogy was very helpful. You need in-line fuses in 3 places. I included the fuses we decided on, based on our system as well:
- Charge Controller –> Batteries
- 20A fuse – matches the rating of our 20A charge controller
- Solar Panels –> Charge Controller
- 20A fuse – calculated based on [2 panels * 5 amps each * 1.25 (industry rule) = 12.5 Amps], so used the next size up
- Inverter –> Batteries
- 150A fuse – calculated based on our 1500W 12V inverter, [1500W / 12V = 125A + 25% safety factor = 156.25A), which we rounded down to 150A because we don’t intend to ever use all 1500W of our inverter (detailed why in our Induction article)
3. What Do I Need?
The items below are what we decided to buy for OUR specific needs and preferences. There are many options out there, so decide on the best products/brands for you!
For most up to date prices, use the links. The total amount we spent are shown at the bottom of the three sections.
The products below are Amazon Affiliate links. If you click the link and purchase from the merchant, the price you pay is the same, plus we’ll receive a small commission fee. This will help us cover the costs of hosting our blog, and keep it running for future van builders.
1. Main Components
| Image | Component | Brand | Link | # |
 |
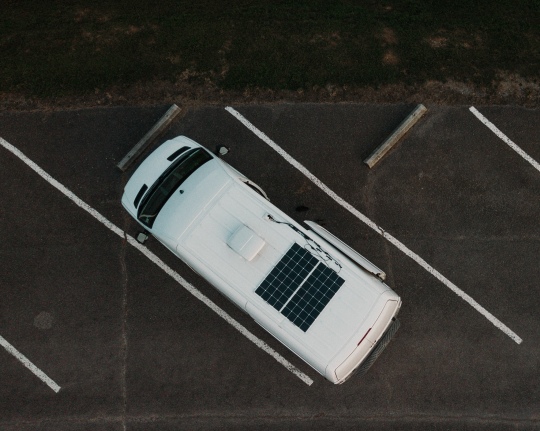
Solar panels | AllPowers | AllPowers 100W Flexible Solar Panels | 2 |
| Flexible panels don’t require bulky roof racks and are more stealthy (not visible from the ground). There’s some discussion around their efficiency and durability compared to solid panels but we have not had any issues so far. | ||||
 |
Solar batteries | Vmaxtanks | Vmaxtanks AGM Deep Cycle 125Ah Batteries | 2 |
| AGM Deep Cycle batteries are the safest choice (little to no maintenance, no off-gasing or leaks). They should not be discharged more than 50% for optimal performance. So two 125Ah batteries = 250Ah, but only 125Ah should be used before it needs to be recharged again. Calculate your needs to figure out what will work for you. | ||||
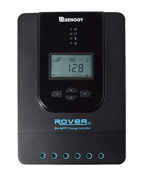 |
Charge controller | Renogy | Renogy 20A MPPT | 1 |
| An MPPT charge controller will be much more efficient than a PWM. For our 200 watt system, we use a 20A controller. If you have a larger system, you’ll want to look at 40A or more. | ||||
 |
Inverter | Power TechOn | Power TechOn 1500W Pure Sine Inverter | 1 |
| Pure Sine is more efficient than Modified Sine. We went with a 1500W purely to power our induction cooktop. It comes with a on/off switch. The inverter should always be switched off when you are not actively using it to charge/power something. | ||||
 |
Fuse block | Blue Seas | Blue Seas 12-circuit Fuse Block | 1 |
| Fuse block with bus bar included* Appliances, including your fridge, fan, lights, water pump, etc. should be connected to a fuse block to protect them. In the event they draw too much energy, the fuse will break and cut the circuit. | ||||
| Total Cost | $1304 | |||
2. Supporting Components
| Image | Component | Brand | Link | # |
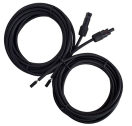 |
Adaptor kit cable | Renogy | https://amzn.to/2CPUwUy | 1 |
| 20Ft 10AWG adaptor kit solar cable w/ MC4 female and male connectors. Connects solar panels to charge controller | ||||
 |
MC4 Y branch connectors | Renogy | https://amzn.to/2COBspt | 1 pair |
| Connects solar panels in parallel | ||||
 |
Solar cable entry | Linksolar | https://amzn.to/2NKOkOz | 1 |
| Weatherproof cable entry from van roof to interior | ||||
 |
Wire Tool | Irwin-vise | https://amzn.to/2CpSTMk | 1 |
| Used for stripping, cutting, and crimping wires | ||||
 |
Wire Terminal/ Connector kit |
Gardner Bender |
https://amzn.to/2Cmxu6G | N/A |
| **We didn’t get a kit but would recommend getting one. Most on Amazon only go to 10 AWG, so 8 AWG would be purchased separately. If you go with a kit, ignore the 12 AWG terminals and connectors below | ||||
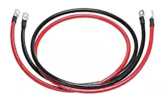 |
4 AWG wire | Spartan | https://amzn.to/2Cmxu6G | 3 pairs |
| 4 AWG is the thickest wire we used and we chose to order them with the ring terminal already attached to make it easier | ||||
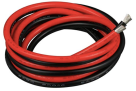 |
8 AWG wire | BNTECHGO | https://amzn.to/2RUKwgR | 2 pairs |
| Terminals can be crimped on | ||||
 |
8 AWG ring terminals | Gardner Bender |
https://thd.co/2M2jHmJ | 1 |
| Ring terminals are compatible for connecting to the solar batteries, inverter, and fuse block | ||||
 |
12 AWG wire (red) | Southwire | https://thd.co/2NkEHdi | 1 |
| Get wire that is specifically stranded, which is more efficient than solid wire | ||||
 |
12 AWG wire (black) | Southwire | https://thd.co/2NlvilH | 1 |
| Get wire that is specifically stranded, which is more efficient than solid wire | ||||
 |
12-10 AWG Ring terminals | Gardner Bender |
https://amzn.to/2CODF4p | 1 |
| Ignore if you purchased a terminal/connector kit | ||||
 |
22-10 AWG twist-on wire connectors | Gardner Bender |
https://amzn.to/2yNPsvw | 1 |
| Ignore if you purchased a terminal/connector kit | ||||
 |
In-line fuse 150A | Baomain | https://amzn.to/2NKQfCL | 1 |
| Fuse holder with 150 Amp ANL Fuse included – used between the inverter and batteries. | ||||
 |
Maxi fuse 20A | Pico | https://amzn.to/2yKIDKV | 2 |
| Maxi Fuse Holder with 8 AWG wire – used between 1. solar panels and charge controller and 2. charge controller and batteries. | ||||
 |
Large fuse blades 20A | King Auto | https://amzn.to/2NLR65X | 2 |
| To be used with the maxi fuse holders | ||||
 |
Fuse blades (assorted) | BestToyHome | https://amzn.to/2CQAau2 | 1 |
| Varying sizes based on the appliance being connected to the fuse block | ||||
 |
Electrical tape | 3M | https://thd.co/2oLuvfP | 1 |
| Use around the base of any crimped terminals or twist connectors to hold securely | ||||
 |
Cable clips | Raco | https://thd.co/2wODcdW | 1 |
| Helps keep your wires organized | ||||
| Total Cost | $208 | |||
3. Appliances, Extra/Optional
| Image | Component | Brand | Link | # |
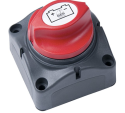 |
Battery switch | BEP | https://amzn.to/2CkLeih | 1 |
| Optional but recommended – connected to batteries to enable you to switch off energy to all your appliances. | ||||
 |
On/off switch | JR | https://amzn.to/2RZ9lbo | 1 |
| Optional but recommended to connect to your electric water pump. This allows you to turn the pump off so it’s not drawing energy when not in use. It also protects the van from flooding, in case your faucet malfunctions. | ||||
 |
DC USB outlet | Magnadyne Electronics | https://amzn.to/2yNQcRk | 2 |
| DC power is much more efficient than AC. We use DC whenever possible – to power our lights, and to charge phones, kindles, camera battery, etc. | ||||
 |
Cigarette outlet | ZHSMS | https://amzn.to/2CnLfBP | 1 |
| The fridge comes with either a DC outlet or AC outlet, we chose to use the DC outlet, which has a cigarette plug that’s wired to the fuse block. | ||||
 |
LED Lights | Luminoodle | https://amzn.to/2RXa4Kq | 2 |
| Most van builds use AC lights but we found these easier to mount, and they plug into DC outlets. | ||||
 |
Dimmer (2) | Luminoodle | https://amzn.to/2NKQxJR | 2 |
| Two remotes in different locations in the van allow us to turn the lights on/off or dim them. | ||||
 |
Induction cooktop | Duxtop | https://amzn.to/2CnKngw | 1 |
| This is highly optional* We decided to use an induction cook top, instead of the propane cooker seen in 99% of vans. | ||||
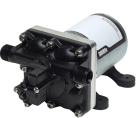 |
Electric Water Pump | Shurflo | https://amzn.to/2CmZyXn | 1 |
| Optional, other builds use a manual foot pump which doesn’t require any wiring. | ||||
 |
Fan/vent | MaxxAir | https://amzn.to/2CnKV64 | 1 |
| This fan is a life saver and pretty much required if you are traveling in warm weather. We selected MaxxAir over the popular Fantastic Fan brand because it has a rain cover, meaning you can use it for cooking even when it’s pouring and muggy out. | ||||
 |
Cooler/fridge | Dometic | https://amzn.to/2CPqkJ0 | 1 |
| Again, highly optional. This fridge was the single most expensive item in our build. However, it has been extremely useful, allowing us to save $$ by cooking our own meals, and removing the need to constantly pick up ice. There are slightly cheaper options available for solar powered fridges. | ||||
| Metal strap | avail @ Home Depot | N/A | 1 | |
| Used to secure the batteries to the ground while driving. The batteries are extremely heavy so we needed a heavy duty option. We also built a wood box around the batteries to protect them from water damage. | ||||
| Total Cost | $1300 | |||
4. How Do I Put It Together?
Step-by-step walk through of how we connected our solar system. Many of the instructions are specific to our build. Adjust where needed based on your appliances, fuse needs, and wire sizing.
1. Plan
- Map out your interior space – Get a general idea of where your batteries, fuse block, inverter, and charge controller will go.
- Figure out your wire sizing – This will vary depending on the appliances you have, but you should always use a wire that is thick enough to handle the energy draw, otherwise it can be a electrical hazard. The wire sizing called out through this guide is what we used, based on our appliances, take these with a grain of salt if you have different components!
Many people start by mounting their panels, but we recommend to get an idea of where you want to mount your solar panels and solar entry box but don’t do it just yet. You will damage your panels if it is wired to your charge controller before the rest of the system is hooked up, mainly the charge controller and batteries!
2. Mount Charge Controller

3. Wire batteries
- If you have more than one battery, you’ll want to create your battery bank.
- 4 AWG battery cable – wire them in parallel, meaning:
- Connect the positive terminal on one battery to the positive on the other
- Connect the negative terminal one battery to the positive on the other

When wiring components into the batteries, use the positive terminal of one battery, and the negative terminal of the other. This way the batteries are discharged at the same rate, rather than one battery being drained first.
4. Ground batteries
- 4 AWG wire – Ground the negative terminal of one of the batteries to the van’s metal body. We unscrewed one of the heavy bolts near the back doors, hooked one end of the wire, and retightened the bolt.
- We used a metal securing strap from Home Depot to bolt the batteries to the van floor. You can also use actual ratchet straps but they are pricier
5. Connect charge controller to battery switch
- Mount the battery switch close to the battery bank
- 8 AWG wire – Connect the positive terminal of the charge controller to the battery switch

6. Connect battery switch to Fuse #1 [Charge Controller –> Batteries]
- 8 AWG wire (part of the maxi fuse holder) – Connect the battery switch to one end of the in-line fuse

7. Connect in-line fuse to batteries
- Connect the other end of the in-line fuse to the positive terminal on one battery
- If your batteries are too far away, extend the wire on the in-line fuse with more 8 AWG wire using twist connectors.
8. Connect charge controller to batteries
- Now that the positive is connected:
- 8 AWG wire – Crimp 8 gauge ring terminal to one end
- Connect the negative terminal on one battery to the negative terminal on the charge controller
- This can be screwed directly into the charge controller (no ring terminal needed)
9. Mount solar panels
- For our flexible panels, we decided to use industrial strength velcro to mount them.
- We did have concerns about whether they would hold but many months later, they haven’t budged! This is through crazy storms, with heavy rain and fast winds. Alternatives also include Z Brackets and/or VHB Tape
- Cut strips of velcro and place with an inch or two gap between each, along all four sides of the panel. The spaces allow for a little bit of air flow underneath the panels, which is recommended. It also keeps the heat of the panel from touching the roof of the van directly, which makes the interior hotter.
10. Mount cable entry box
- Drill two holes through the van roof
- Mount the cable entry box (either using VHB tape, velcro, or screws)
- Use sealant around the box to keep it waterproof
11. Wire solar panels
We opted to wire our panels in parallel, because performance does not drop if part of one panel is shaded (like it does in series). Being in a van, you’ll likely be parking in places with some partial tree shade. It also keeps the charging at 12V.
Source – Renoly Series vs Parallel
- Wire positive leads from both panels to (1) MC4 branch connector
- Wire negative leads from both panels to (1) MC4 branch connector
12. Connect adapter kit to solar panels
- Attach positive lead of the adapter kit to the positive MC4 branch connector
- Attach negative lead of the adapter kit to the negative MC4 branch connector
- String both leads through the holes in the cable entry box
- To keep the wires in place on the top of the van, we used industrial strength velcro underneath them.
13. Connect solar panels to Fuse #2 [Solar Panels –> Charge Controller]
- Cut and strip the positive lead of the adapter kit, making sure it can reach the fuse block
- Using twist connectors, connect the in-line fuse to the positive wire
- Add a ring terminal to the free end of the in-line fuse
If you are not using a maxi fuse, and are instead using a mounted fuse (shown below). You can add ring terminals to the end of the adapter kit, connect to the fuse, then do the same with a separate length of wire (add more ring terminals) and finally wire to the fuse block.

14. Connect fuse #2 to charge controller (which is already connected to batteries)
- Connect the fuse wire (which is connected to the solar panels adapter kit) into the positive solar terminal on the charge controller
- Connect the negative lead of the adapter kit to the charge controller
- These can be screwed into the charge controller (no ring terminals needed)
15. Connect charge controller and fuse block
- Mount the fuse block – it should be somewhere central and accessible within the van
- 8 AWG wire
- Connect positive load terminal on the charge controller to the terminal on fuse block
- The end going to the fuse block needs a ring terminal (either already attached or crimped on)
- Connect negative load terminal on the charge controller to the terminal on fuse block
16. Mount the inverter

16. Connect the batteries to Fuse #3 [Battery –> Inverter]

- Mount the in-line fuse between the inverter and batteries; add the ANL fuse
- 4 AWG wire (red wire that comes with the inverter)
- Cut the positive wire (red) for the length from the battery to the in-line fuse. Crimp ring terminals to one end (the other includes a ring terminal already)
- Connect the wire to the positive terminal of one battery and one end of the in-line fuse
UPDATE: We swapped the 4 AWG wire connecting the inverter and batteries with 2 AWG wire because our induction cooker wattage was making the wires too hot. The wire gauge here will be much smaller for those of you NOT using induction. Base it off what you plan to power from the inverter.
17. Connect fuse #3 to inverter
- Cut the positive wire (red) for the length from the in-line fuse to the inverter. Crimp ring terminals to one end (the other includes a ring terminal already)
- Connect to one end of the in-line fuse and the positive terminal of the inverter
18. Connect batteries to inverter
- 4AWG (black wire that comes with the inverter)
- UPDATE: we switched this to 2 AWG based on our induction cooker
- Cut the negative wire for the length from the batteries to the inverter
- Connect to the negative post on one battery to the negative terminal on the inverter
19. Connect the inverter switch and extension cable
- Comes with the inverter, plug it in and then mount the switch somewhere accessible
- Connect an extension cable with AC plugs directly to the inverter. This will be used for any AC appliances:
- Induction hob
- Laptop chargers (older models like MacBook Air use AC, while the new Macbook uses DC)
20. Ground inverter
- 4 AWG wire
- Ground the negative terminal of the inverter to the van’s metal body. We unscrewed one of the heavy bolts near the back doors, hooked one end of the wire, and retightened the bolt.
16. Connect 12V DC/cigarette outlets to the fuse block
- 12 AWG wire – Cut and strip positive and negative wires (red/black), then crimp ring terminals on one end of each
- Wire positive post on the back of the outlet to the fuse block
- Wire negative post on the back of the outlet to the fuse block
- Outlets will be used for any DC appliances
- Lights
- Fridge
- Phone charger
- Kindle charger
- Camera battery charger
- Based on the fridge specs, select an appropriate fuse blade. Add it to the fuse block and test the fridge
Our batteries were delivered to us at 100% charge, which allowed us to test the appliances! Test each appliance after hooking it up so you can determine which is causing a short circuit, rather than searching for issues at the end.
17. Connect fan to the fuse block

- 12 AWG wire
- Using twist connectors, add longer positive and negative wires onto the wires coming off the fan (so they can reach down to the fuse block)
- Make sure the twist connectors are very tight, use electrical tape around the bases
- Crimp 12 gauge ring terminals onto the other ends of the positive and negative wires
- Wire both to the fuse block
- Add an appropriate sized fuse blade to the fuse block
- Test the fan on different settings
18. Connect electric water pump to on/off switch
- Mount on/off switch close to the sink
- 12 AWG wire
- Using twist connectors, add wire to the positive lead coming out of the switch, so it can reach the pump
- Strip the end of the positive wire and crimp on a female disconnect terminal
Terminals came with our DC outlets - Plug the prong on the back of the pump switch into the first female disconnect terminal
- Measure a length of positive wire (red) from the pump switch to the fuse block
- On one end, crimp on a ring terminal
- On the other end, crimp on a female disconnect terminal, plug the second prong on the pump switch into this
- Connect the positive wire into the fuse block
- Measure a length of negative wire (black) from the pump to the fuse block
- Using twist connects, wire to the negative lead coming out of the switch
- The other end should connect to the negative bar on the fuse block
- Add an appropriate sized fuse blade to the fuse block
- Test the pump (even if it’s not hooked up to a water tank, it will make a noise when switched on)
Congratulations!! You’ve completed a daunting project and now, adventure awaits!
5. Flow Diagram

6. Extra Thoughts
Battery Monitor – I’m sure many people will notice we did not add a monitor to our system, which would tell you the battery % state. Frankly, we ran out of time and decided to leave it out of our build before our trip, but are looking to add one soon (and will update this post). Dedicated battery monitors are fairly expensive so we weren’t entirely sold on buying one yet either. Renogy told us there is a way to read an approximate battery level by looking at the voltage draws on the charge controller LED screen, with 12.5 equalling about 75% power and 12.2 about 50%. This post by EnergyMatters explains in more detail, with close numbers for AGM batteries as mentioned by Renogy.
DC is much more efficient than AC – We see a lot of people buying AC outlets for their van build, but would recommend DC outlets, which are much more efficient. The inverter isn’t working to convert the energy from DC to AC before charging. Also, most electronics (except laptops) can charge from DC, using the USBs that connect to phones, kindles, etc. The laptops can be plugged either into the inverter or an extension cable connected to the inverter.
Alternator – If you expect to drive a considerable amount in your van, an alternator is a good choice to help charge your solar batteries. We may add one in the future, rather than a 3rd solar panel.
And that’s all! Good luck and feel free to leave a question in the comment section!

I have noticed you don’t monetize bitesizetravels.com, don’t waste your traffic, you
can earn additional cash every month with new monetization method.
This is the best adsense alternative for any type of website (they approve all websites), for
more info simply search in gooogle: murgrabia’s tools
LikeLike
Thanks dude, Great info!
LikeLike